Showing posts with label furniture. Show all posts

Thursday, March 9, 2023

Cottage Dreaming

I have a bunch of ideas for the little cottage I'd like to make, and would like to incorporate them all into one, but I'm not sure how to go about it yet. Since I can only have one small dollshouse, I'd really like to try and add all the different types of features I want in a cohesive way. At this rate, it's never going to happen. LOL

I have a few minis I've been collecting over the years and have temporarily placed them, along with some I've made, inside a little garden box/ greenhouse I recently found. 

The bench and birdhouse in this first pic are made by http://katiesclaycorner.blogspot.com/ I absolutely love her birdhouses and have quite a few different ones. The bench was a custom request she agreed to make me and I adore it. It even has a few spots on the seat that look like they could be nail holes. 


The little tray holding the books on the floor in the next pic is also made by Katie. The books themselves I got years ago from http://carolynslittlekitchen.blogspot.com/ I also have some of the adorable little plates she makes. 

I made the plant stand from wire, beads and cardstock. Mercedes from  http://libertybiberty.blogspot.com/ has a similar one in her beautiful french house and that's where I got the idea to make mine. I also made a smaller one in another color. 


This is the little set up I have created just to make myself happy in the meantime. Hopefully, I can 
get started on a little cottage at some point this year. Fingers crossed! :)


Thank you for stopping by to visit. Happy Friday Eve and have an amazing weekend!

Big mini hugs,
-Iris :)


Thursday, March 2, 2023

Is it laundry day?

Nope! Not for me. 
Although, if I had a cute laundry basket like this it might motivate me. Maybe. LOL

I made this little laundry basket with a lot of blood, sweat and tears. 
Not really. More like...frustration, sore fingers and eventually patience. 
In the end, I am happy with how it turned out for being a first try.


Believe it or not, the clothes pins were much easier to make. I couldn't find the toothpicks that already have the decorative ends so, I used the regular kind and just sanded the little groove to give it a round head. I slit the other end with a hobby knife to give it that split look. I then aged them to give them that weathered look as if they've been outside on the clothes line doing their job. I made the basket that holds them out of wood and the handle is a small piece of wire with a bead strung through. It was a tight fit getting the wire through the bead and I may or may not have split one or two others in previous attempts. 


I'm thinking maybe I'll use the other two containers as laundry detergent storage...? I made them out of wood and glued embroidery floss around them. The idea is to finish them off to look like tin/ enamel containers, with a bit of rust of course. I also would like to use water decals to label them. I made the tiny scoops out of cardstock and edged them with the same embroidery floss. They're very tiny! 


Hope you've enjoyed your visit. Thank you for stopping by.

Big Mini Hugs,
-Iris

Tuesday, September 6, 2022

A little dabbling...

 While I have not been creating much of anything these past few years, I got a little itch recently and decided to distract myself. I made this cabinet/ bookcase by deconstructing an unfinished hutch that Michaels Arts & Crafts used to sell many moons ago.


I wanted a stained wood look for the top. I don't have any stains, so I used a mixture of watered down acrylic paints to give it a similar look. 


This is what the cabinet originally looked like. I have a few of them (different designs) that I am now so happy I thought to buy. Even though at the time I had no idea what I was going to do with them all. LOL I'm glad I got them when I did. Michaels stopped selling them shortly after I bought them. They were only $1 and can easily be taken apart. I used the top part, turned upside down for this project. 


I hope you are all doing well, and finding time to get crafty. 

Wishing you all an amazing week! 

xo,
Iris :)


Tuesday, May 29, 2012

Who wants a giveawaaaaaay?!?!?!

A few weeks ago I was finally able to do a little something in terms of minis. It isn't much or anything fancy shmancy, but I hope you like it. This is what I'd like to give you in the form of a giveaway. Yippee, my first!!!   LOL  

There are no rules. The only thing I ask is that if you are becoming a new follower you are doing it because you are actually interested in my blog, and not for any other reason. I know sometimes people wonder if you need to have a blog of your own, but for me you do not need to. It seems unfair to put limitations because I've met and shared so many things with people, with and without blogs. Everyone shares the same passion and interest for this hobby, and not having a blog doesn't make you any less likely to share your knowledge, feedback, experience, swaps, gifts, etc. So, come one, come all and have fun. LOL

Now on to what we've gathered here for....lol.......
This is what I have for now. I feel like it's missing something, so if I can I will try and figure out what that is and add it.


Here are a few close ups. These are just a few decorative items. You know how I like old and worn...lol. I tried giving these an old patina look instead of my usual rust. The little white one is some sort of dish I put together and painted white. It still needs a few touch ups, and I'm not sure if I should give it some wear.


Flowers close ups. These you've seen before and some of you seemed to like them so I made these for the giveaway.

And here is a pic of the inside of the buffet table. The paper on the doors is the same as on the top.


I almost forgot, I have to set a date for this thing...lol. I'm not feeling any of the days in June without making this giveaway too short, so I'll go into July. You can participate until July 5th. I'll do the draw on the 6th (my mom's b-day). Good luck!!!   =)

Have a beautiful day!

Thursday, September 22, 2011

A Tisket, A Tasket, My Wonky Lil' Basket & Before/After

Okay, so for some time now I've been searching for some #18 needlepoint fabric to make some baskets I saw in an old Nutshell News magazine. I've checked three different craft stores and the only thrift shop I know of, and nothing! I really like how they look and just wanted to give it a try. I also want to try some of Casey's (http://caseymini.blogspot.com/) techniques with it.
So since I can't find the needlepoint fabric, I decided to try weaving in the meantime. I found a book at the library that I love because it's full of DIY. Very basic, but good for this newbie!  =)  I can get a better sense of scale and how things can be made.
Here is my first attempt at weaving a basket. My poor, sad attempt......

This is the shape I wanted:

ROTFL......It looks nothing like it......LOL! I was trying to keep the wires fanned outwards, but I think I was so focused on keeping the weave tight I lost the shape. I also couldn't find the waxed thread it calls for so I used hemp instead. Oh well, I still have other sizes and shapes to try so....

I also wanted to show you my before & after. The only mini furniture I can afford at the moment are the $1 hutches from Michaels......lol.  I've seen six different styles of them, but you can never find them all at once.

This is one of the them:

And from it I made this:

Ignore the opening of the door handles on the inside of the door. I'm still thinking on whether I should paper the inside of the doors with the same paper that is on the top of it. Not sure if it would be too much.....?


Again I tried to muck it up a bit, but it was not right. I painted, re-painted and re-re-painted it. So, before letting this small, inanimate object force me to use a bunch of colorful words that a lady should never utter, and fling it across the room, I decided to just paint and sand, and call it done!  =D

Happy Thursday to you!!!

Thursday, September 15, 2011

1 table, 2 tables, 3 tables.....

I'm still trying to achieve that worn look. I read somewhere that using metallic paste (went looking for it, didn't find it, still don't know what it is) gives the effect of age and depth. It also said that shoe polish can be used as an alternative. So, I found shoe polish! And I must not know how to use it because it was not pretty after applying it. To use it, I ended up dabbing off most of it on a paper towel and applying it with a stiff paintbrush. That's what you see on the round table. I'm not sure if I like it much. It doesn't look as 'dirty' or worn as I've seen around.

I made the base with wood beads and a part of earring, which I also tried to give a little rust to.


I don't see using table two in what seems like is going to be my forever unfinished dollhouse. I whitewashed this one and still want to add some sort of writing/phrase along the round edge. Maybe in the future I'll be able to buy a smaller cottage type house and try my hand at beach cottage shabby.

And table numero 3.....
I see I need to touch up those white spots. =)


I'll seal them when I'm sure of the final look.

Hope everyone is having a great day!!!

Monday, September 12, 2011

Extras accompanying the bookcase

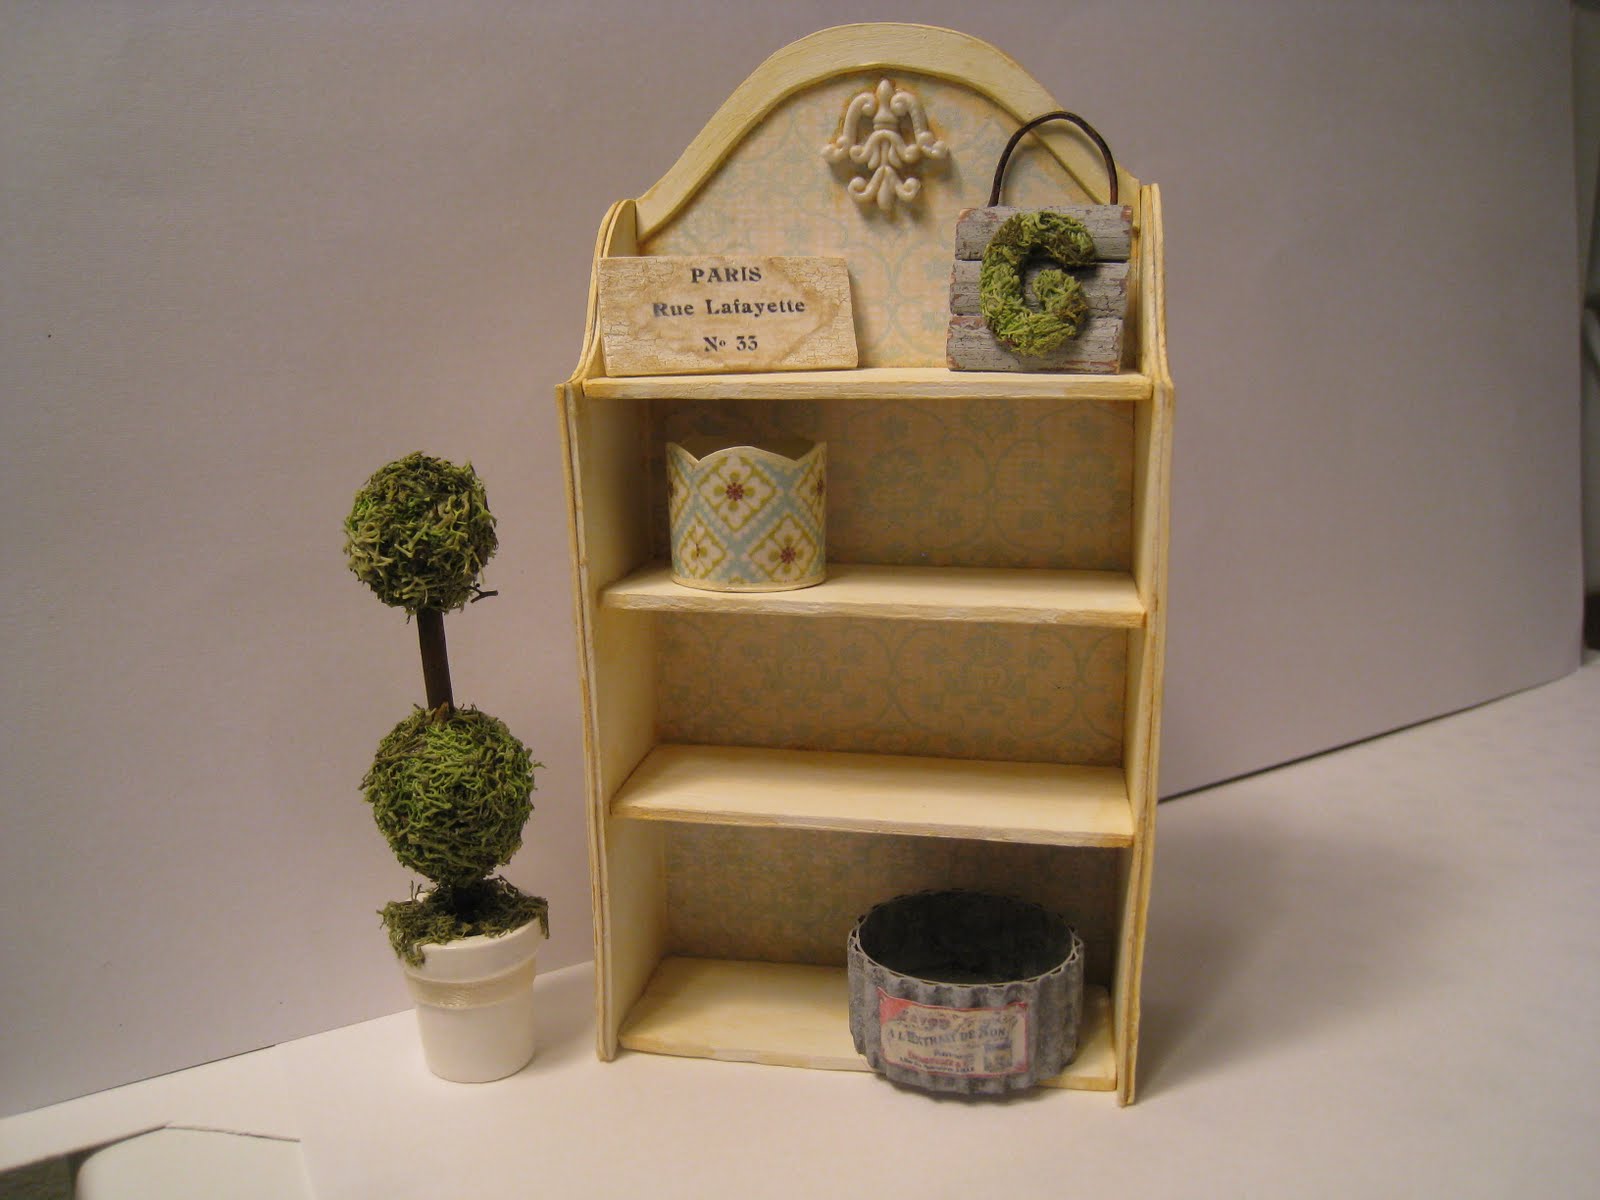
I made the bookcase from the previous post as a thank you gift, which BTW, I really hope the recipient likes it. I didn't want to just send a lone bookshelf, so I made a few extras for the journey. They are not intended for the actual bookcase.

After everything was all packed and ready to ship I realized I could have rusted the zinc container a bit (just because I really like the rusted look....lol). It's okay though. We'll just say that it's never been used outside. =) That gray-ish thing on the bottom shelf is what is supposed to be made out of zinc, in case you're wondering. =D


Here's a closer look at the mossy letter. I really like this! Don't know why, just think it's cute!


Sorry for the poor lighting of the pics. It was all rain and gloom here this past week.

Hope everyone had a good weekend and ready for the week ahead!   =)

Friday, September 9, 2011

Bookcase

I've been itching to make some bigger piece of furniture. So far all I've actually made have been small decorative items. Marlies famous pitchers (I really do love these!), picture frames, various containers, etc. So using some bristol board and super sticks this is what I got. I wanted to give it some kind of aging so that it wouldn't look so new. I hope that is how it looks and not just like a messy attempt. LOL  Any advice or pointers to better it will be welcome. =D


I hope everyone is having a beautiful day. Here it has been pouring non-stop since Monday. Although, it seems the sun is trying to make an appearance today. Happy weekend!!!


=D